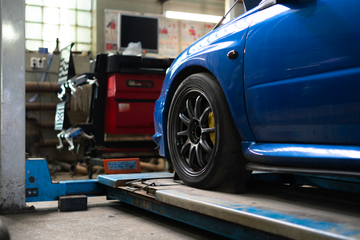
Upgrading your Subaru WRX's suspension system with coilovers is one of the best modifications you can make to enhance its performance and handling. This guide will walk you through the WRX coilover install process, ensuring you get the job done right and maximize the benefits of your new suspension setup.
Why Install Coilovers on Your WRX?
Coilovers offer a range of benefits that make them a popular choice among WRX enthusiasts:
Improved Handling: Coilovers provide better handling and stability, allowing you to tackle corners with confidence.
Adjustable Ride Height: You can lower or raise your WRX to achieve your desired stance and improve aerodynamics.
Customizable Damping: Adjusting the damping settings lets you fine-tune the suspension for different driving conditions, from daily driving to track days.
Enhanced Aesthetics: A properly lowered WRX looks more aggressive and stylish.
Tools and Materials Needed
Before starting the installation, gather the necessary tools and materials:
- New coilover kit (front and rear)
- Jack and jack stands
- Socket set and wrenches
- Torque wrench
- Spring compressor
- PB Blaster or penetrating oil
- Rubber mallet
- Screwdrivers
- Alignment tools (recommended for post-installation alignment)
Step-by-Step Guide to Installing Coilovers on a WRX
Step 1: Preparation
Park on a Level Surface: Ensure your WRX is parked on a flat, level surface. Engage the parking brake and use wheel chocks for added safety.
Loosen the Lug Nuts: Slightly loosen the lug nuts on all four wheels before lifting the car.
Raise the Car: Use a jack to lift the car and place it securely on jack stands. Remove the wheels.
Step 2: Remove the Old Suspension
Spray Penetrating Oil: Apply penetrating oil to the bolts and nuts on the suspension components to make removal easier.
Disconnect the Struts: Remove the bolts securing the struts to the hub assembly. Use a rubber mallet if necessary to gently tap them out.
Remove the Top Mount Bolts: Under the hood, locate and remove the bolts securing the top of the strut to the chassis.
Remove the Strut Assembly: Carefully remove the entire strut assembly from the car.
Step 3: Install the New Coilovers
Assemble the Coilovers: Follow the manufacturer's instructions to assemble the coilovers if they are not pre-assembled.
Install the Coilover Assembly: Place the new coilover into the strut tower and secure it with the top mount bolts. Tighten them to the manufacturer's specifications.
Reconnect the Hub Assembly: Attach the bottom of the coilover to the hub assembly and secure it with the bolts. Use a torque wrench to tighten the bolts to the recommended torque settings.
Repeat for All Corners: Repeat the removal and installation process for the remaining three corners of the car.
Step 4: Adjust the Coilovers
Set the Ride Height: Adjust the ride height of each coilover to your desired setting. Make sure all corners are even.
Adjust the Damping: If your coilovers have adjustable damping, set it according to your preference and driving conditions.
Step 5: Final Checks and Alignment
Reinstall the Wheels: Put the wheels back on and tighten the lug nuts by hand.
Lower the Car: Carefully lower the car off the jack stands and fully tighten the lug nuts using a torque wrench.
Check for Proper Installation: Ensure all bolts and nuts are securely tightened and there are no loose components.
Get an Alignment: It's crucial to get a professional alignment after installing coilovers to ensure proper handling and tire wear.
Tips for a Successful Coilover Install
Follow Manufacturer Instructions: Always refer to the coilover manufacturer's instructions for specific installation details and torque specifications.
Work Safely: Use proper safety equipment and take your time to avoid mistakes.
Double-Check Your Work: Ensure all components are securely tightened before driving.
Conclusion
Installing coilovers on your Subaru WRX is a rewarding project that can significantly improve your car's performance and appearance. By following this step-by-step guide, you can confidently tackle the WRX coilover install process and enjoy the enhanced handling and ride quality that coilovers provide.
For more detailed advice and product recommendations, consult with a professional or visit reputable auto parts retailers specializing in WRX components.


